If you're raising a mountain bike kid, it's only a matter of time until you'll be shopping for their first helmet – probably at the same time as you're choosing their first runner bike or child seat, how awesome.
But despite all the excitement of this mini mountain biker milestone, choosing the right helmet can actually be tough with a toddler in tow, and there are a few pitfalls to avoid when sizing up your little one’s new lid.
With the above in mind, here are 5 mistakes to avoid when choosing your little one’s first mountain bike helmet. Read on to avoid them!

1. Choosing the wrong helmet type
It might sound obvious, but not all helmets are designed with biking in mind. If we talk about half face helmets only for a moment here, the two main helmet types you’ll find at your local bike shop are skate helmets and cycling helmets, and both of which meet different safety standards.
Skate helmets are designed for use in multi-impact activity, as in – more frequent, lower consequence crashes, like what happens at the skatepark. They don’t have much in the way of ventilation, meaning your little one will overheat relatively easily, and they also don’t have any rotational impact systems where some cycling helmets do, more on this below.
Cycling helmets on the other hand are designed for protecting one-off, larger impacts – and for this reason, cycling helmets are designed to absorb an impact, making them single use in the case of a decent crash or impact. Cycling helmets are also designed with ventilation in mind, which is why they have vents to funnel air in, to keep your little one cool.
Long story short, the safest option is to pick the helmet for the sport you’re doing, as that’s what the helmet has been designed and tested for.

Top tips: What to look for in a childs mountain bike helmet:
- Look for a cycling specific helmet that meets your countries safety standard. Your local retailer can help with this if you’re not sure.
- Some cycling helmets also have rotational impact systems like MIPs, which offer an additional level or protection for your little one.
Aside from the above, it’s all about fit and comfort – so once you’ve got the right type of helmet lined up, it’s time to size up!

2. Getting the wrong size helmet
One of the easiest mistakes to make when choosing a kids first mountain bike helmet is getting the wrong size, and this can happen in a few ways:
- Choosing a helmet for your child to grow into. Whilst this approach makes sense with kids clothing, it’s certainly not the case with helmets. The best helmet is the helmet that fits them now.
- Handing down a helmet from one child to the next, resulting in a compromise on fit – or in some cases a helmet passed its expiry date (separate topic, but most helmet manufacturers suggest a lifespan of between 3-5 years).
- Choosing a helmet based on age rather than head size. Yes, it can be tempting to use age as a shortcut for choosing a helmet size, but that’s not how it works. Measuring your little one's head circumference is the best way to select the correct size helmet – more on this below!

Top tips: Tips for getting the right size helmet
Every kid's head is different, and all helmet brands fit differently too. Here are some pro tips for getting the right fit.

1. Measure your child's head circumference
The most important indicator of helmet fit is head circumference. To measure your child's head, use a soft tape measure. Measure the distance around their head, locating the tape above their ears and above their eyebrows. Check the helmet’s size guide against your child’s measurement, and if you’re within the size range, move onto the next step.

2. The two finger test
Once your child is wearing a helmet that’s within their size range (in terms of circumference), the next step is to check the fit visually. A nice fitting helmet should have 1-2 finger spaces beneath the helmet and above their eyebrows. Any lower and their visibility can be impacted, any higher and there’s too much forehead exposed to protect your little one in a crash.

3. The pinocchio test
A second visual test is to make sure that your kids helmet (or helmet visor) sticks out past their nose when in place. This is a simple test that makes sure their face is protected as much as possible should they hit the dirt unexpectedly.

4. Hang upside down test
Once a helmet passes the two visual tests above, and any rear retention dials are fastened to a comfortable level, the next step is to ask your little one to lean forward and tip their head upside down, with their helmet unclipped. A good fitting helmet will stay in place, even when unclipped.

5. Chin strap spacing
Last but not least, in terms of fitting the chin strap – when secured, your child should be able to fit one of two fingers in between their neck and the strap. Any more and it's likely too loose, any tighter and it can be uncomfortable for your little ripper.
3. Clipping your childs skin
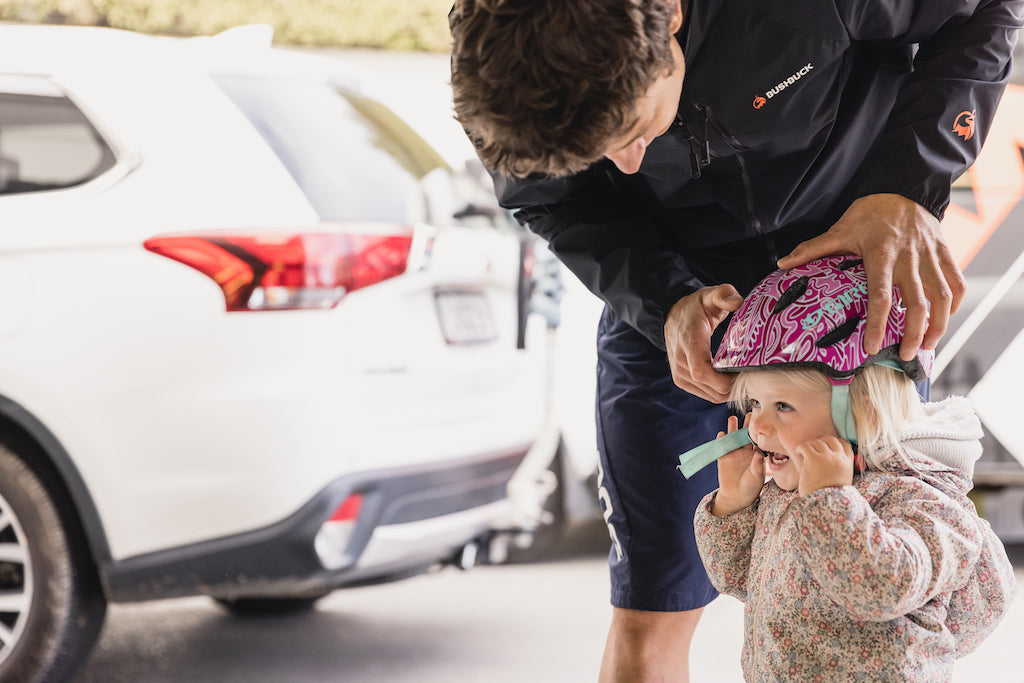
Let’s set one thing straight. When it comes to helmet fitting time, the most important thing is to never ever clip your child's skin.
As careful as you may be, catching your child under the chin is an easy mistake to make. And unfortunately pinching your little one when you test fit a helmet can put your child off wearing a helmet for a good while.
To safely attach a helmet to your mini me, put your finger in-between their skin and the helmet clip, before fastening the buckle. That way in a worst case scenario, you pinch your finger rather than snagging them.
Top tip: Thankfully many helmet manufacturers now offer magnetic buckles rather than traditional pinchy plastic clips. Choose a helmet with a magnetic fastener to remove this risk altogether.

4. Getting a helmet that doesn’t work with their child seat
If your little one is just getting started with bikes, chances are you’re using a child seat in conjunction with their first balance bike or trike. If so, when choosing a helmet, make sure the rear of their helmet fits nicely into the surrounding child seat, and doesn’t stick out or catch on the molded plastic, which would result in your little one’s neck being kinked forward whilst riding.

It sounds simple, but this point is often overlooked. You don’t want to have to choose a new child seat based on bringing the wrong helmet home!
5. Choosing a helmet they don’t like
Last but not least, this one is about giving your little one the best chance of enjoying their new piece of riding equipment – because if they don’t like their helmet, they probably won’t wear it!
Perhaps you get to pick the model, and they get to choose the color? Or maybe they get to choose the stickers for their helmet, or where it lives. Whatever it is, the intention here is allow your mini mountain biker to make their helmet their own.

Top tips: Help your little one love their helmet!
- Let them customise their helmet. To help little people make their new helmet their own, you might like to give them stickers to add, or find another way to make it theirs.
- If possible, choose a buckle they can operate – if they can be independent, then that will go a long way to helping them feel in control of their helmet and riding experience.
- Finally, give them a spot to keep their helmet. You might like to set up a hook for their new helmet beside yours, or give it a special place along with their other riding gear. Not only will this stop their helmet from getting damaged or lost, this will also help to teach your little one about the importance of looking after their helmet.

What did we miss?
If you have a helmet buying mistake to avoid, or a top tip for choosing a first helmet for kids 0-5 years, drop us a comment below.

